
QOps started as a set of PowerShell commands for Qlik developers. It is no longer only that. Over the last couple of months QOps has grown the Portal: a browser window where you run commands, edit files, work with Git, keep QOps up to date and manage your settings. The Portal runs the same QOps commands you would type, so the results are the same. Each release it covers more of the daily work, and we are steadily heading toward a point where you do not need the command line at all. QOps also has an MCP server and a chat now, which we come back to at the end.
One window for the whole workflow
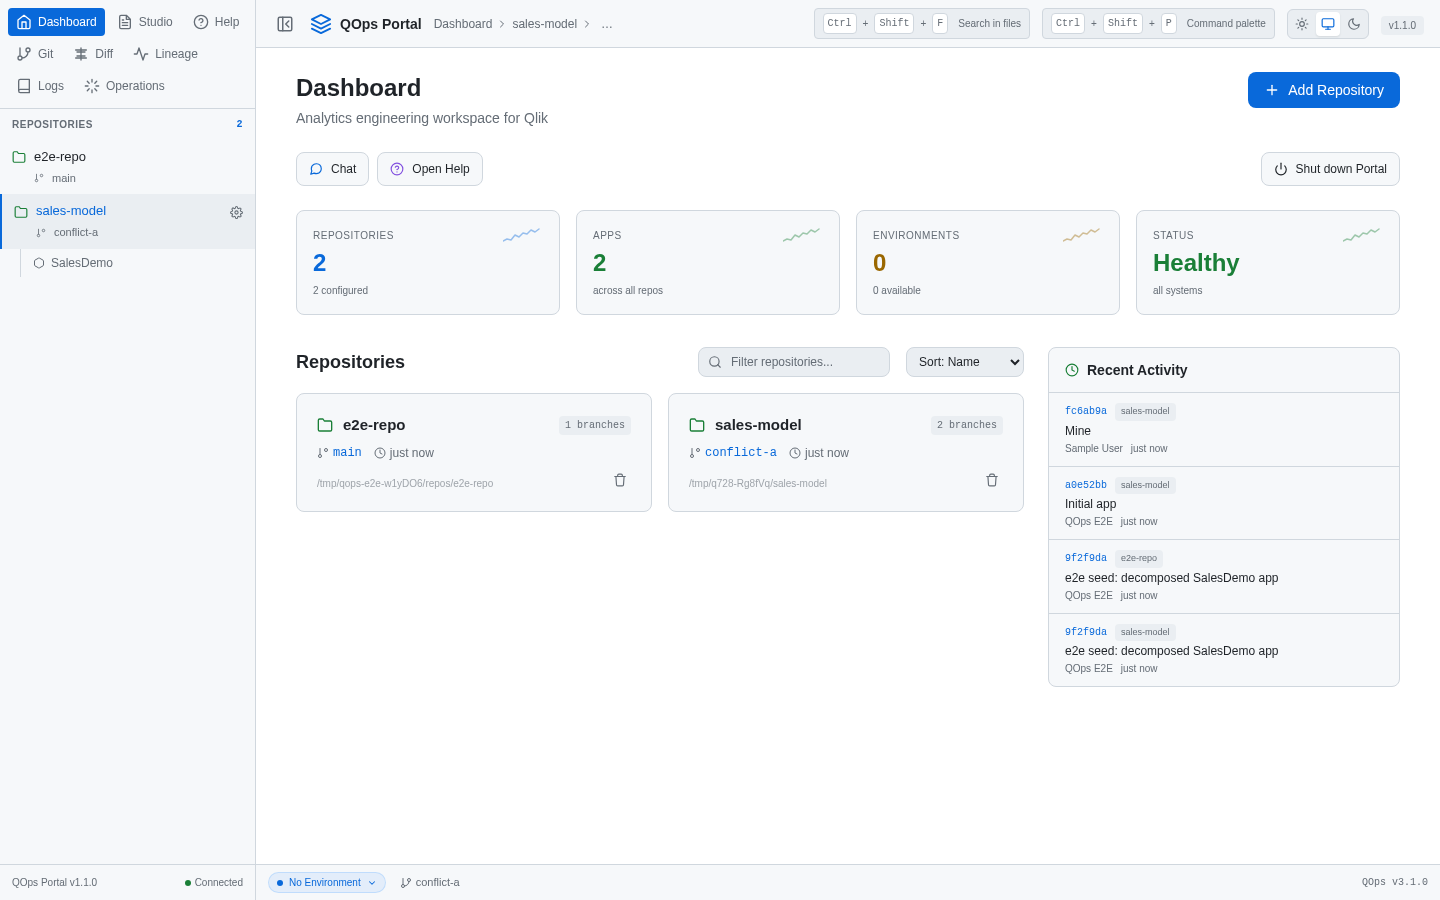
You start the Portal with QOps-StartPortal, and it opens in your browser on your own computer. On Windows, if you installed QOps with the installer, you can also start it from the QOps Portal shortcut on the desktop or in the Start menu. The Dashboard lists your repositories with their branch, apps and recent activity. From the menu you reach Studio, Git, Diff, Lineage, Logs, Operations and Help, and the repository you picked stays selected as you move between them.
Run commands
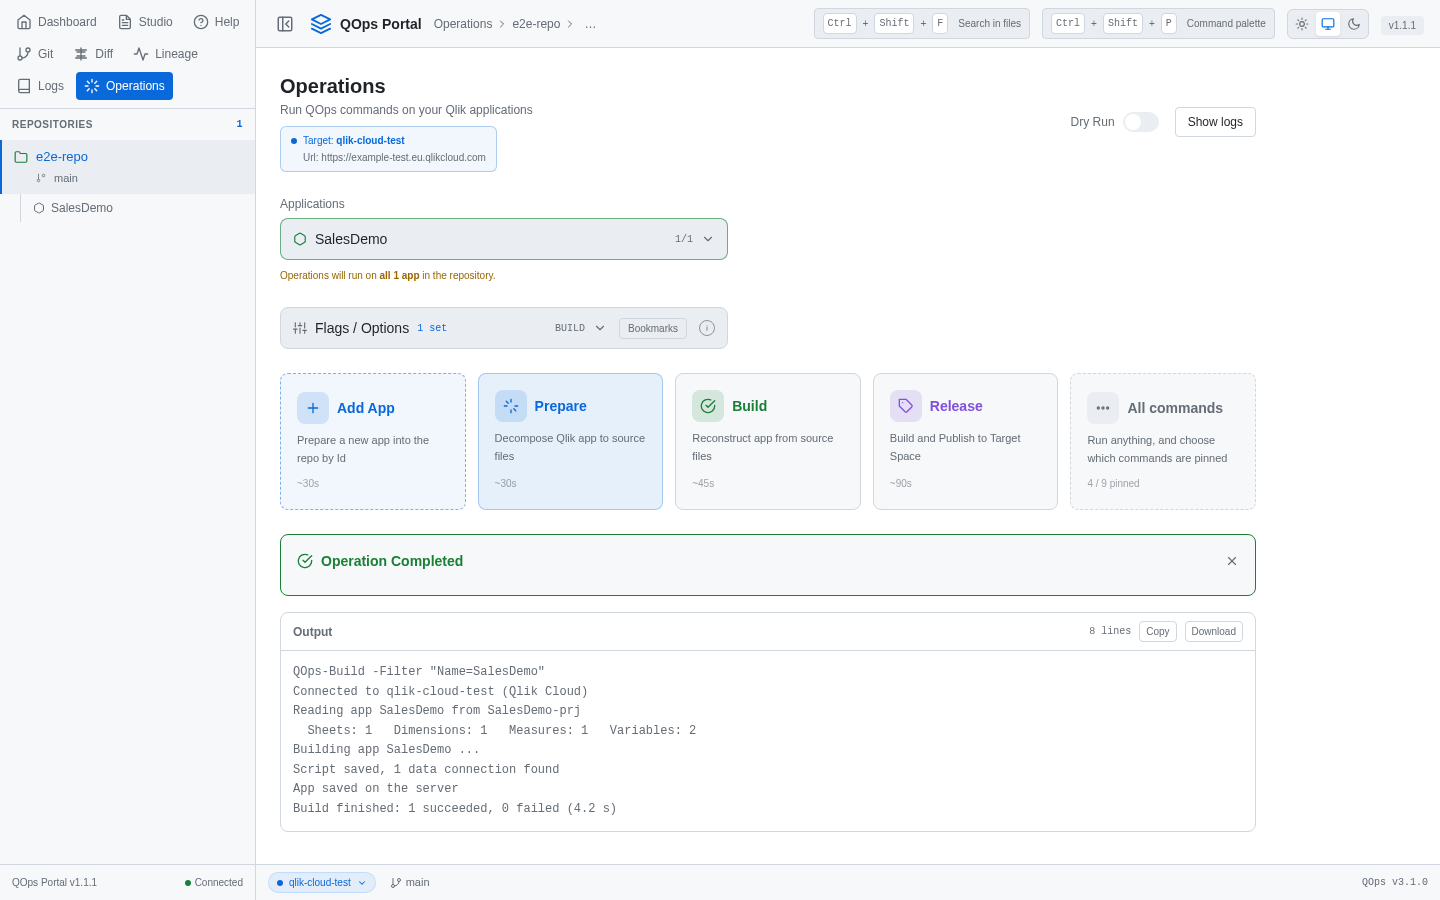
The Operations panel has a button for each step of the QOps workflow: Add App, Prepare, Build and Release, plus All commands for everything else, including Reload and Publish. You choose the apps (one, a few, or all in the repository), set the options for the command, and read the live output as it runs.
- Dry Run shows the exact command that would run and starts nothing.
- Options such as Update only on Build are switches, so you do not have to remember the flag names.
- Long runs can be stopped, and every run is kept in the history with its log, which you can copy or download.
Edit files
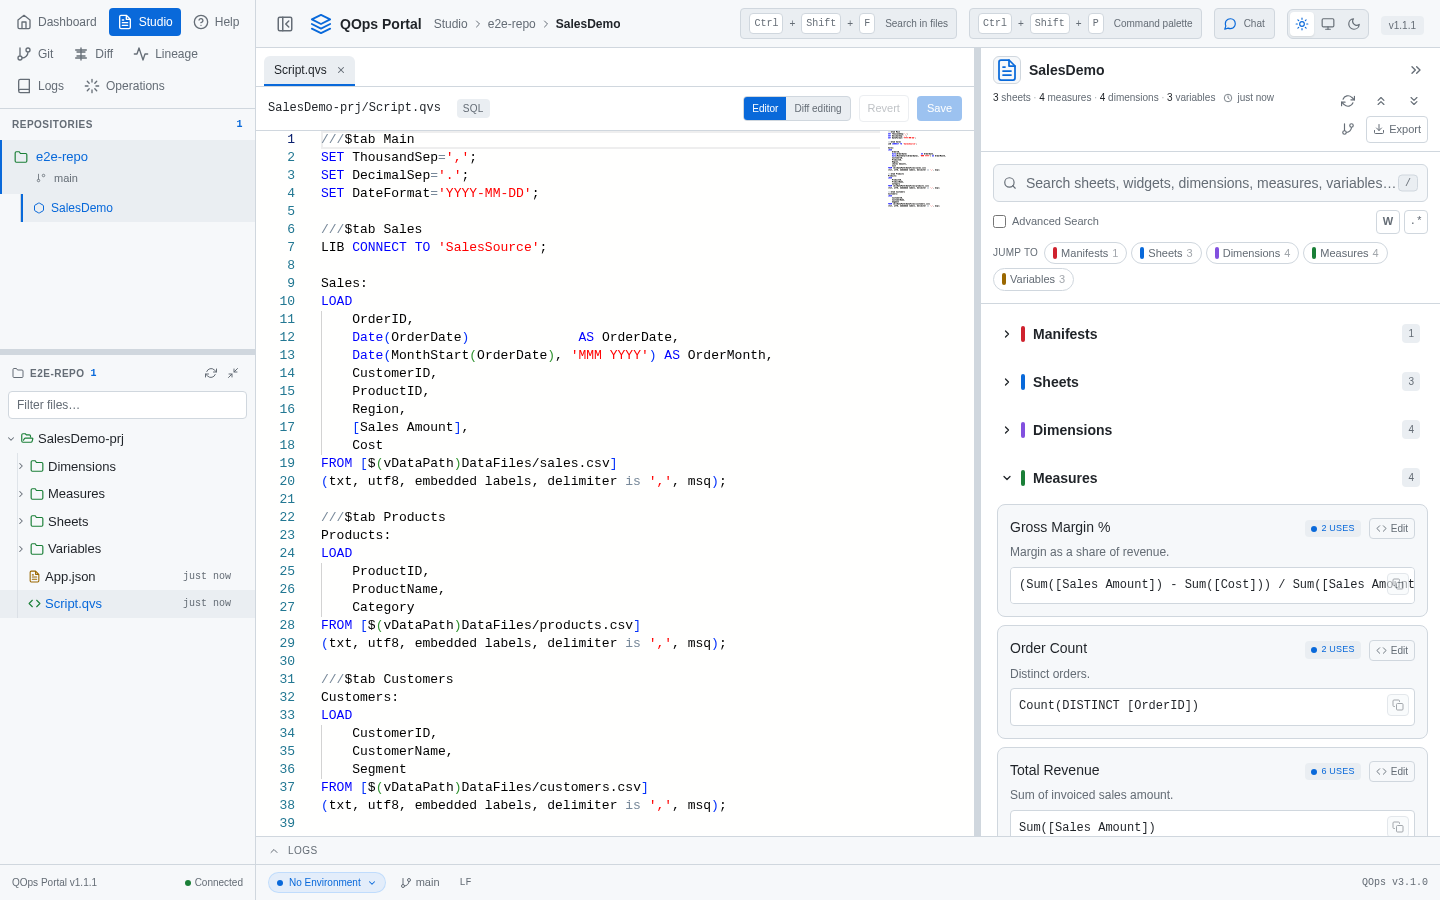
Studio is where you work on an app's source files. It has a tabbed editor and a file tree, and you can create, rename and delete files there. Next to the editor sits the generated documentation of the app: sheets, master measures and dimensions, variables. You can search it, see where a master item is used, and export it. Right-click an app folder or any object in the tree to run Prepare or Build on exactly that part, without leaving Studio.
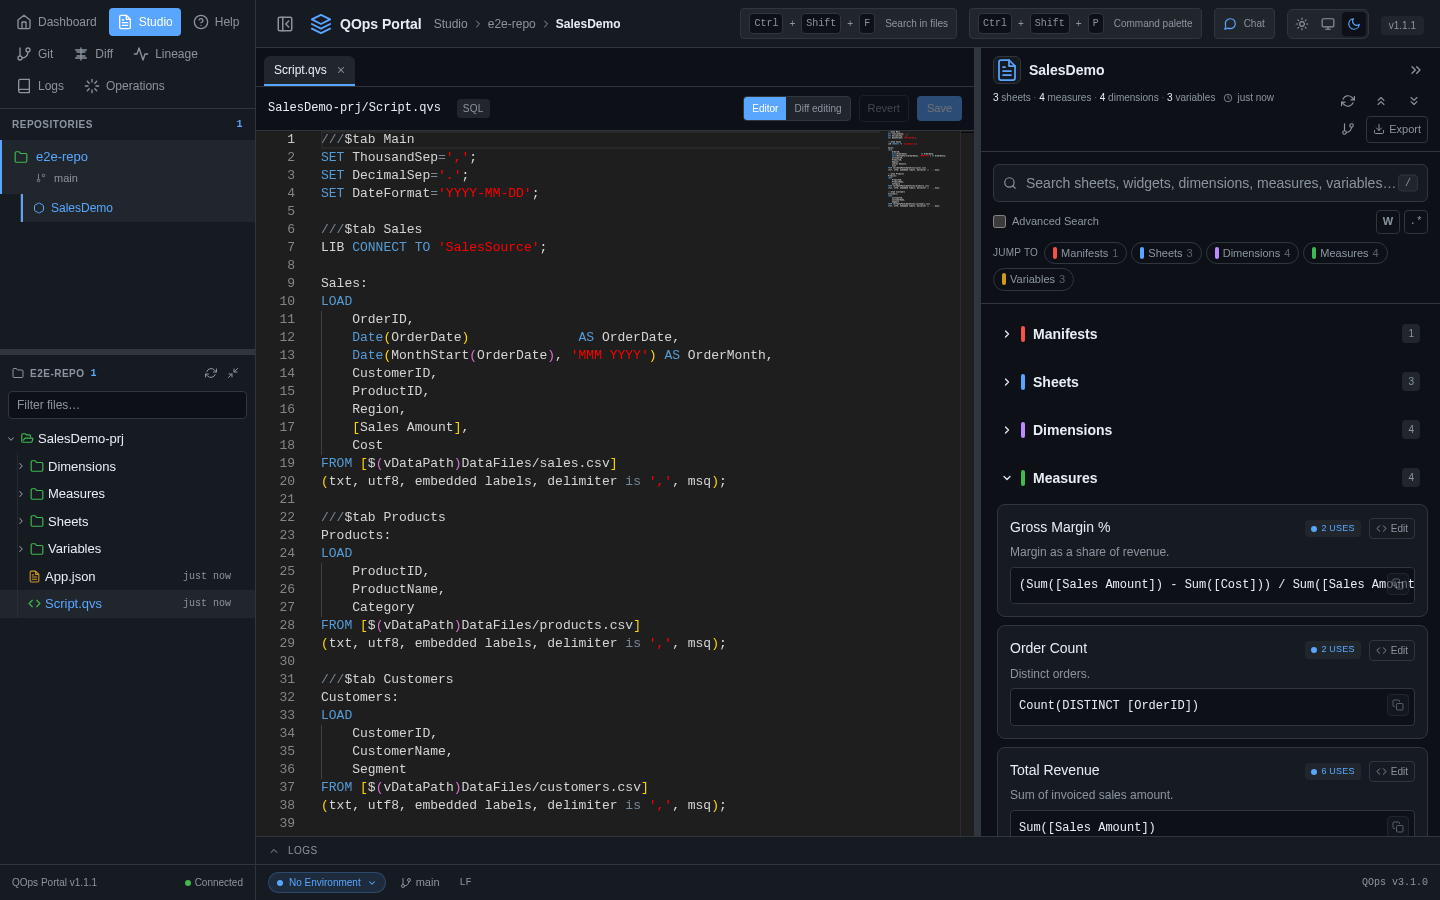
The Portal also comes in a dark theme. Use the theme buttons at the right of the header to pick light, dark, or follow your system setting; the browser remembers your choice.
Work with Git
The Git panel covers the daily routine: stage, commit with templates, push, pull, stash, create and switch branches, and browse the history. The Branches card lists the branches of your remotes next to the local ones. Fetch refreshes them and shows how far behind you are, and one click checks out a remote branch as a local one.
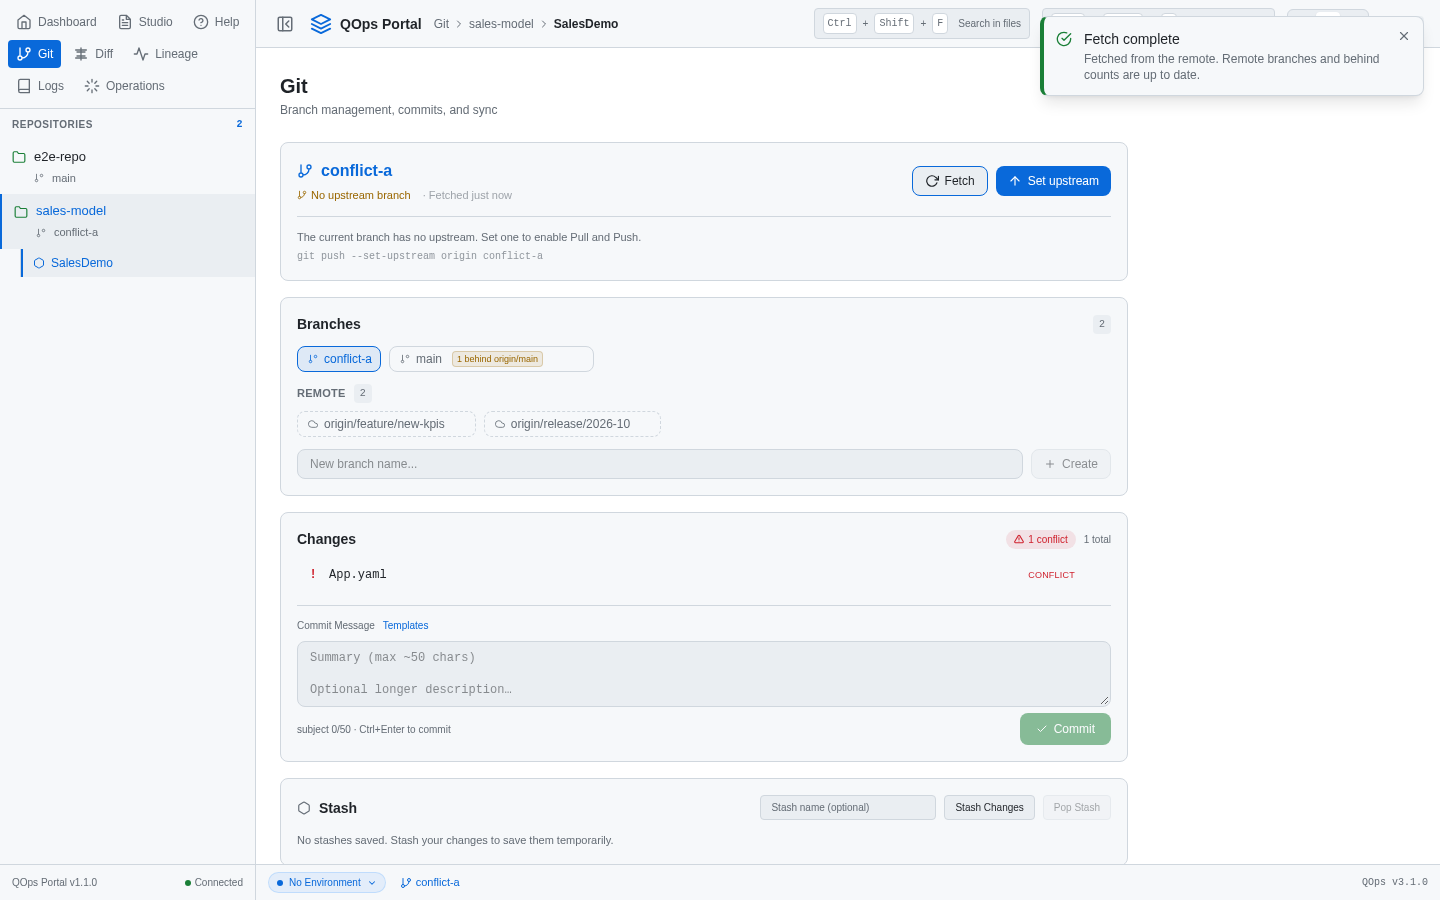
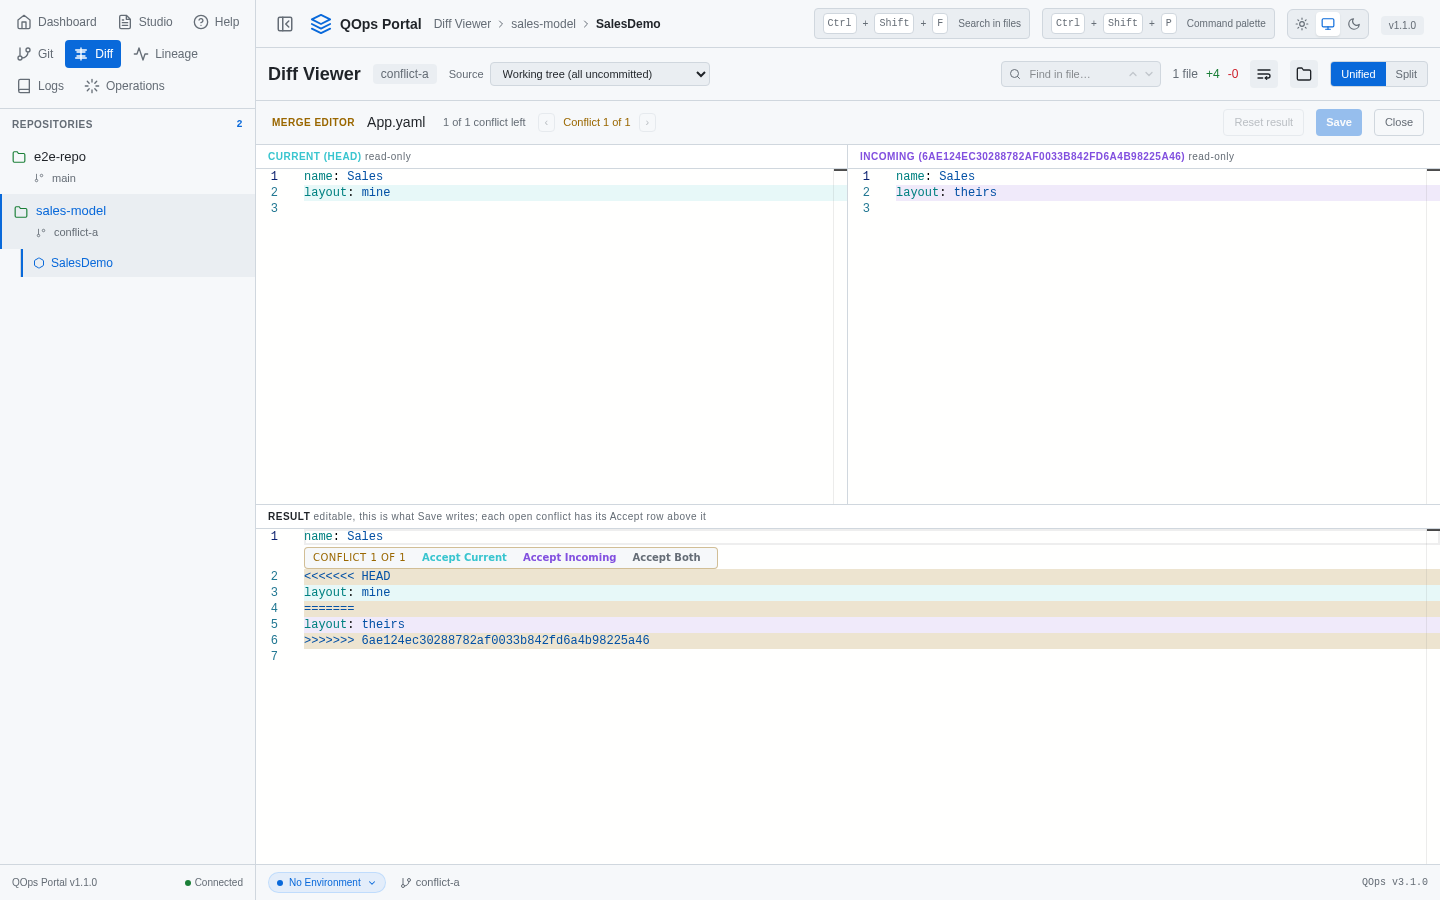
When a merge leaves conflicts, the merge editor shows Current and Incoming side by side with an editable Result below. For each conflict you accept current, incoming or both, and you can fine-tune the text by hand before you save.
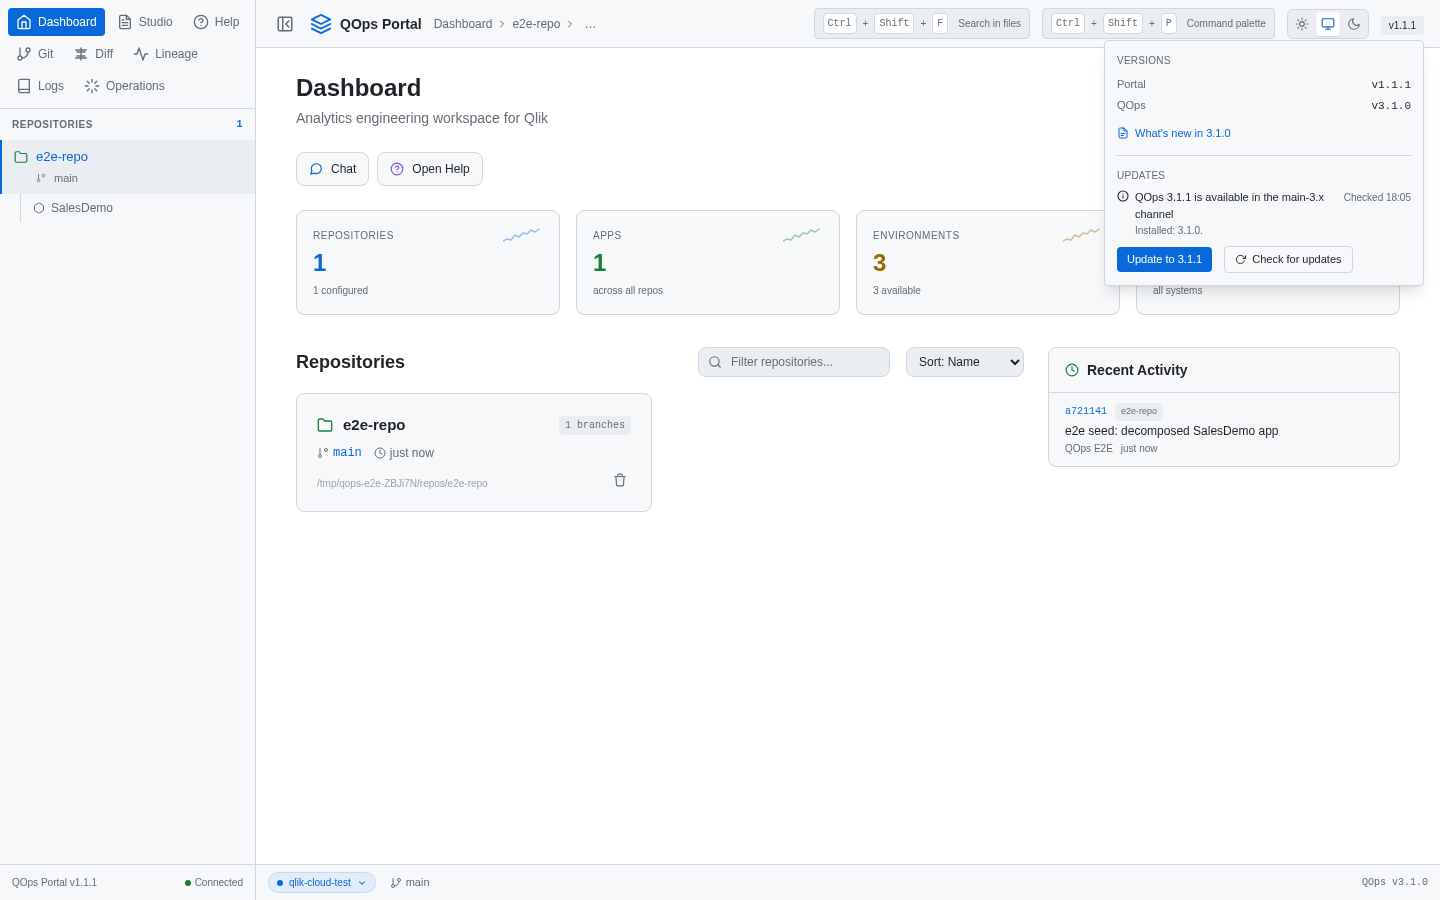
Keep QOps up to date
Click the version number in the header to open the Versions panel. It shows the Portal and QOps versions and links to the release notes for the version you run. Check for updates tells you whether a newer build exists in your update channel, and Update installs it after you confirm. When a Portal started with QOps-StartPortal has a new version installed, it can restart itself on it at the same address.
Settings and environments
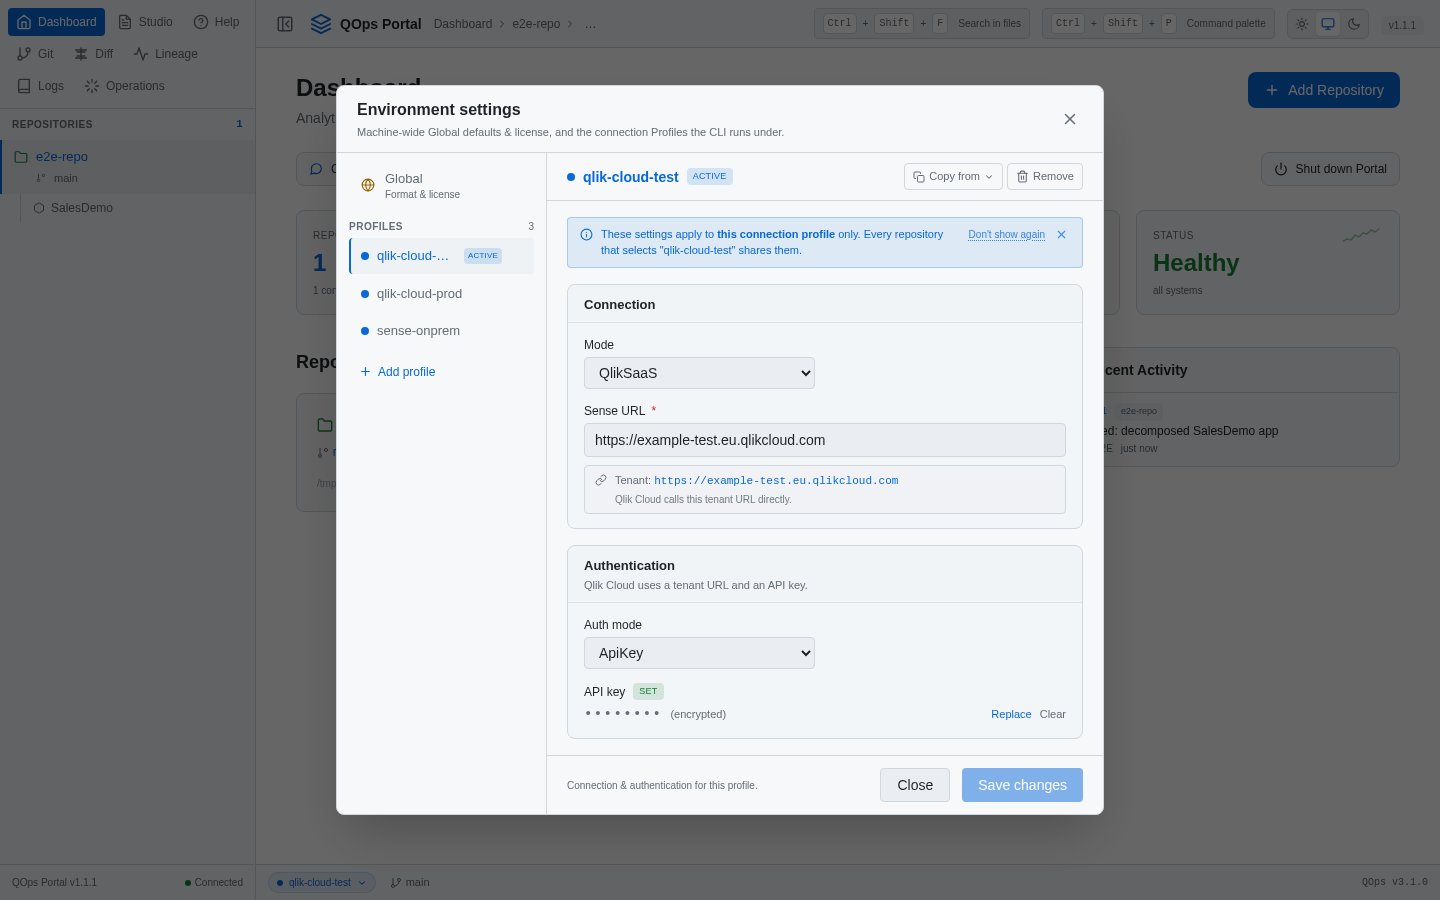
The environment switcher in the status bar lists your connection profiles, for Qlik Cloud and Qlik Sense, and shows which one is active. Pick another and the next run uses it, so the same sources can go to test and then to production.
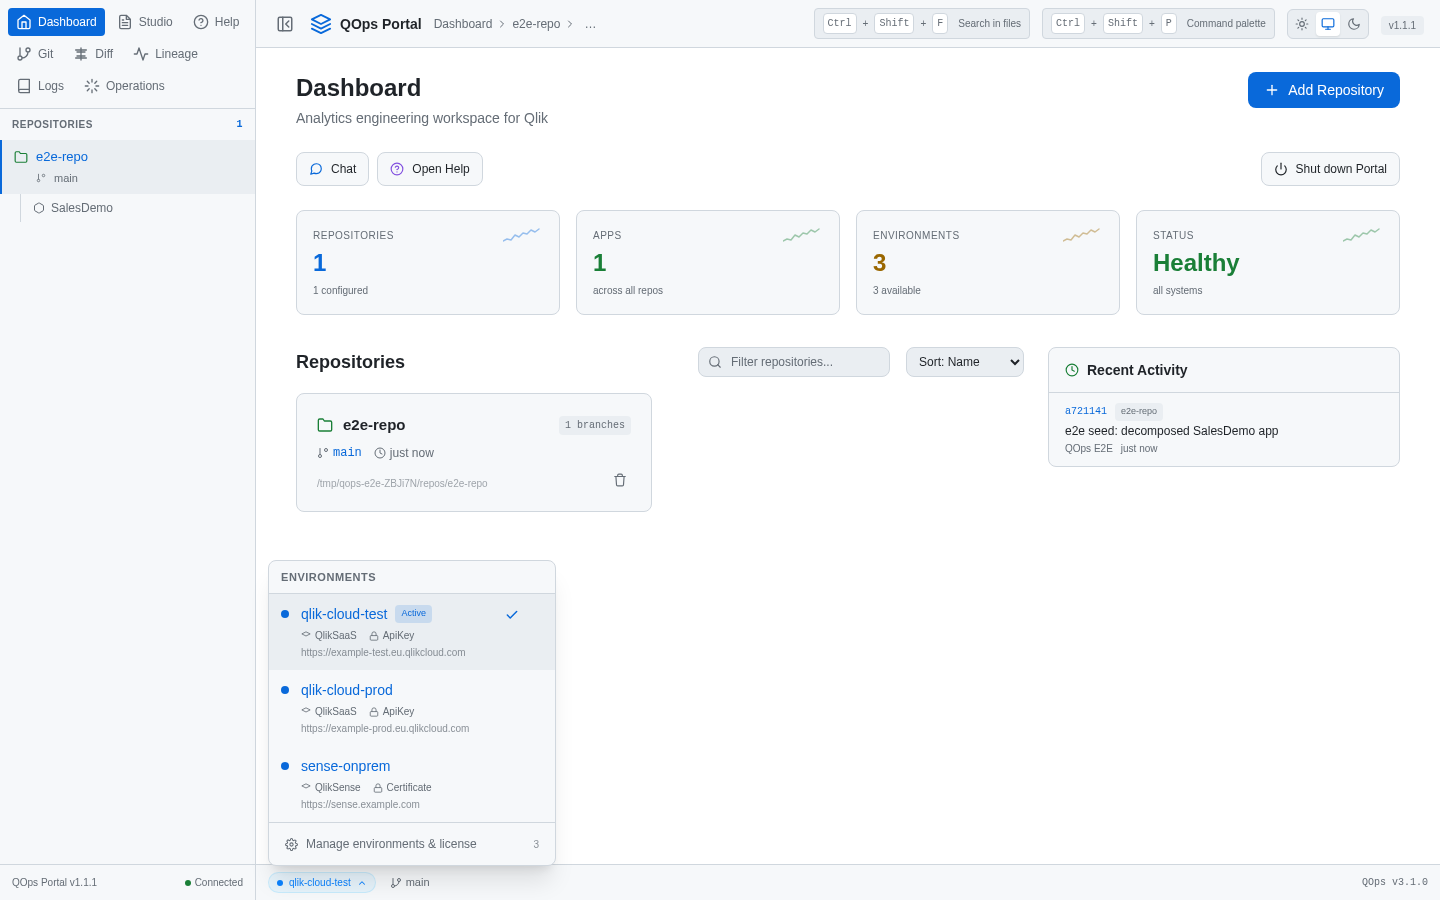
Manage environments & license opens the settings. There you edit each profile's connection and sign-in, and the defaults that apply to the whole machine: serialization format, line endings, license and a GitHub token for updates. Secrets are stored encrypted and are never shown again. Per repository, Settings holds placeholders and hook scripts.
Chat and MCP
QOps also has an MCP server, so AI assistants can work with your repositories and apps, and the Portal has a chat built on it. You choose the provider and model, and the key stays on the Portal's own server. We cover both in the MCP post.
Get started
Open PowerShell and run QOps-StartPortal, or on Windows use the QOps Portal shortcut. The Help panel has a reference for every panel and step-by-step guides, for example for connecting a freshly cloned repository to your existing apps. Everything you do in the Portal can still be done from the command line, so use whichever suits the moment.
No comments yet. Be the first to share your thoughts!
Leave a comment