Since version 1.14, QOps supports JWT Authentication for establish a connection with Qlik Sense Server.
To configure JWT connection read and check following steps.
1. Virtual Proxy Configuration
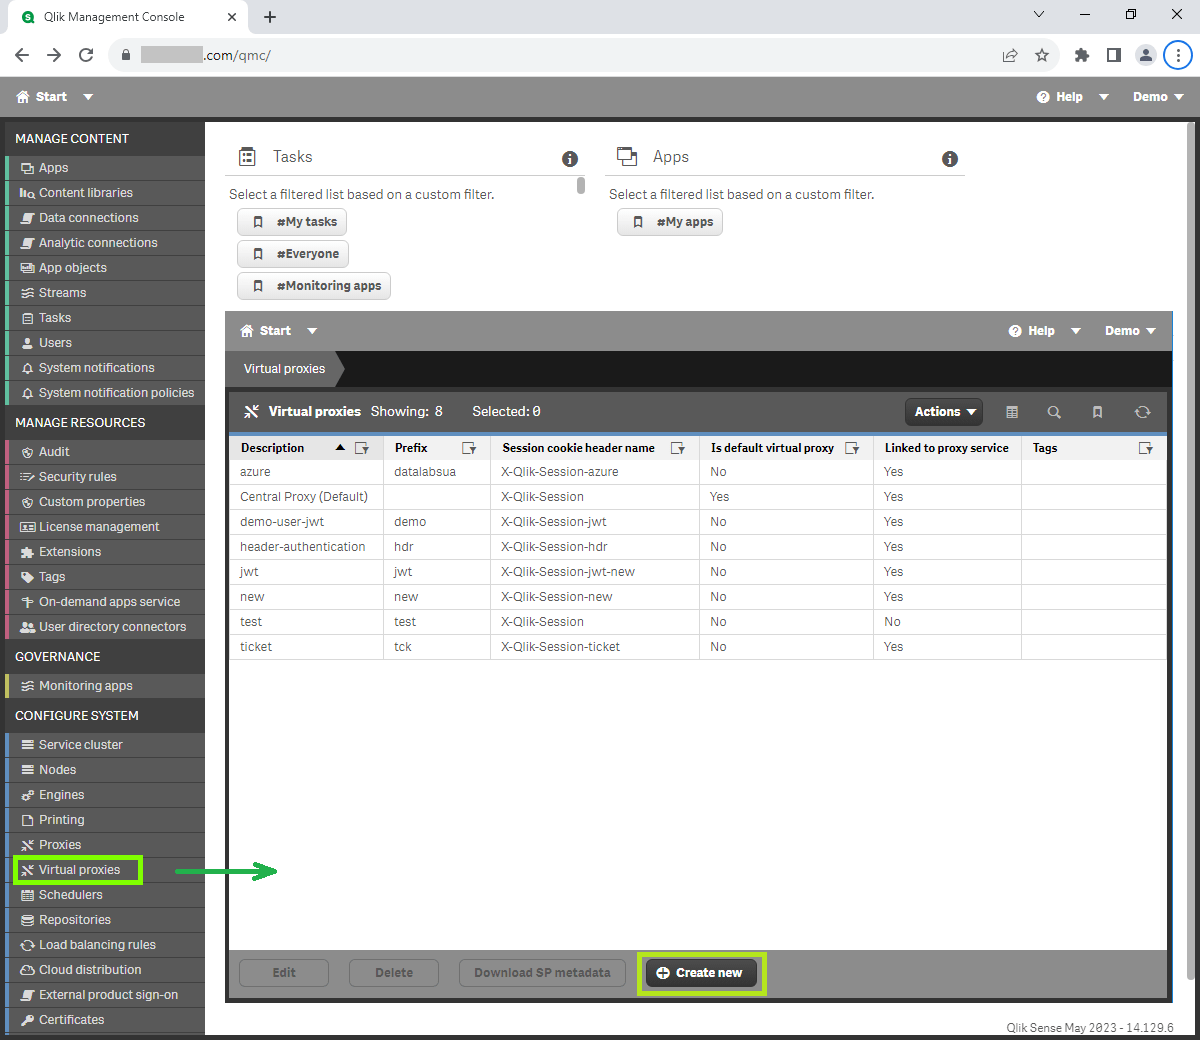
Open QMC, select Virtual proxies, click Create new
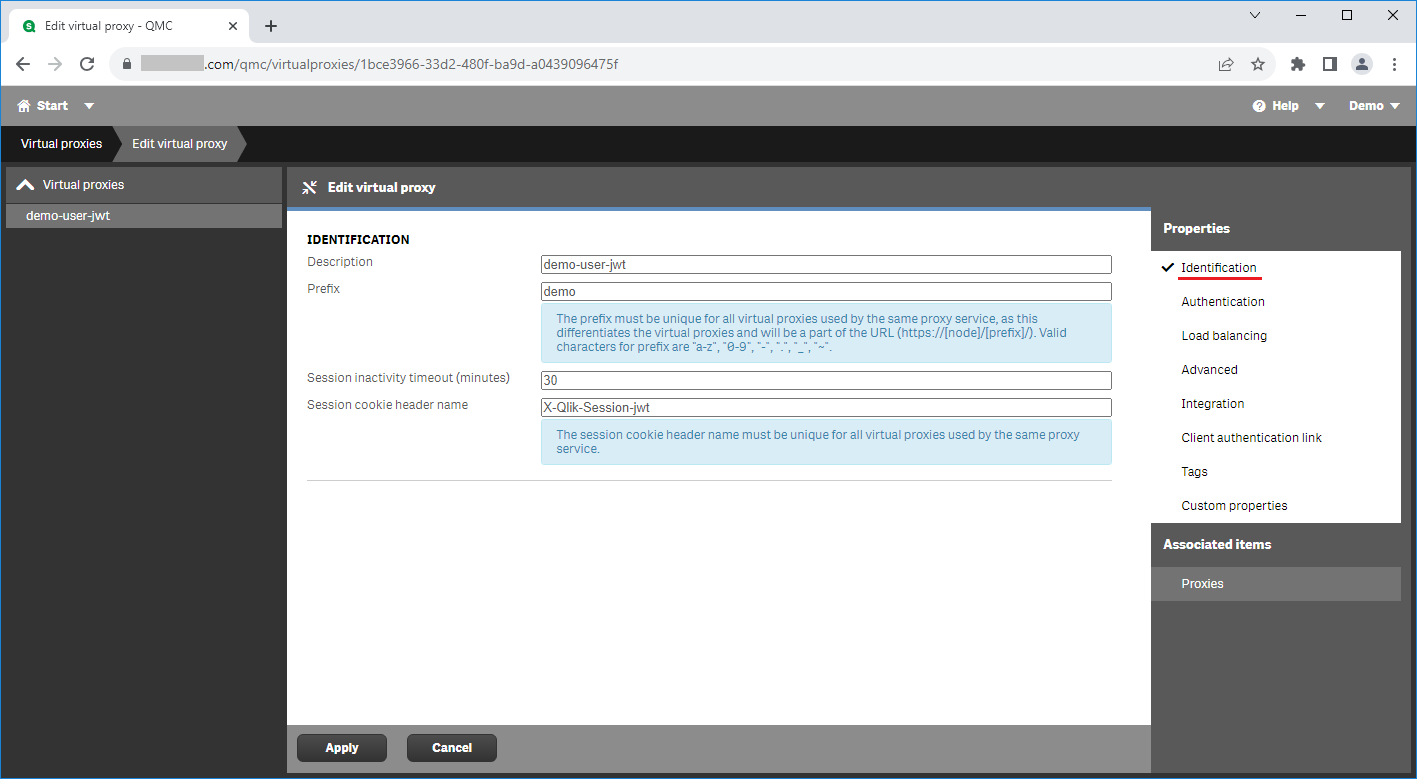
Check Identification section, define Description, Prefix (unique), provide Session cookie header name, for example X-Qlik-Session-jwt
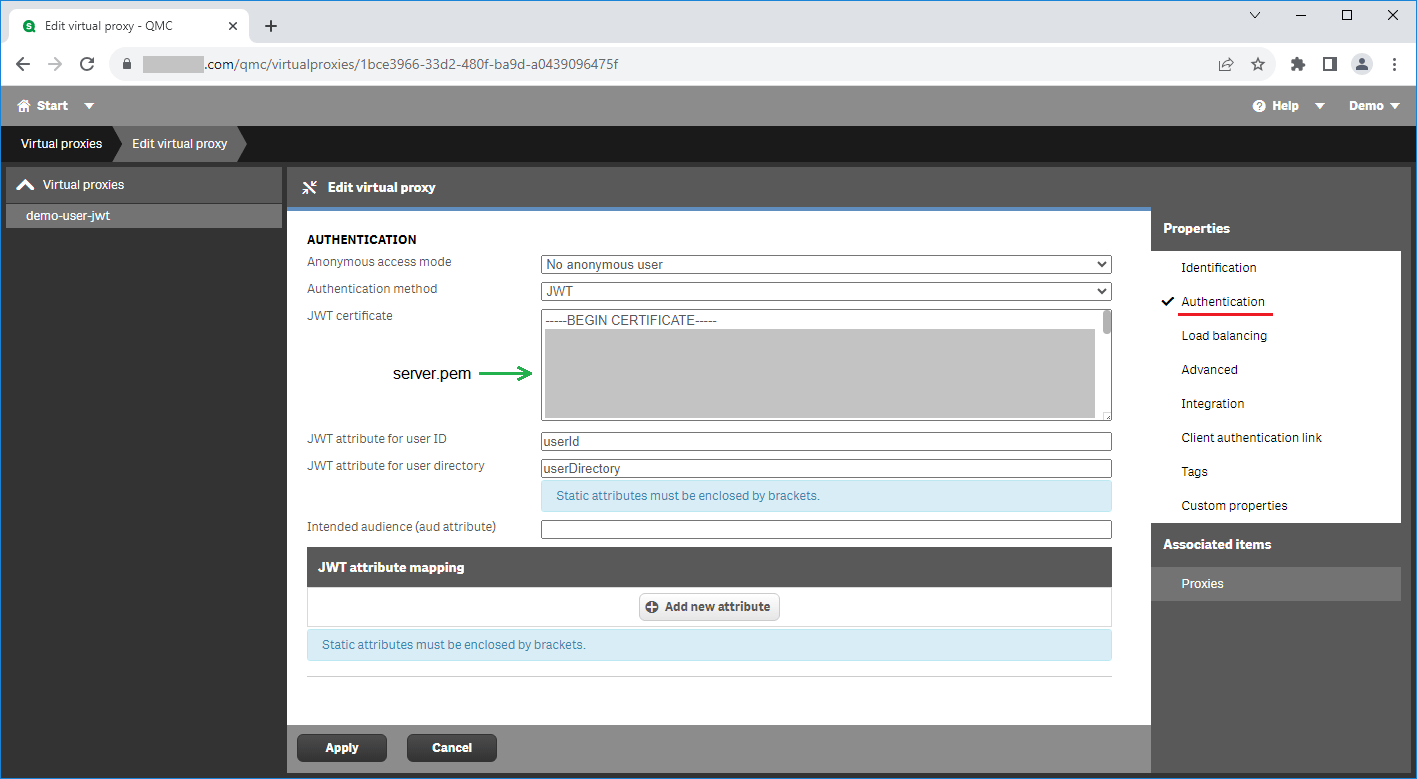
Check Authentication section
- set No anonymous user as Anonymous access mode
- select JWT as Authentication method
- copy content of certificate file and paste into JWT certificate field
- as quick start for this the default Qlik Sense certificate may be used, for example server.pem file from Qlik Default certificates
- in a Production scenario, the customer should generate a private/public key pair for JWT signing and verification according to the internal security policies
- specify JWT attributes as userId and userDirectory for instance, exactly same values must be used during JWT Token generation
Check Load balancing section, verify that at least one Server node is added
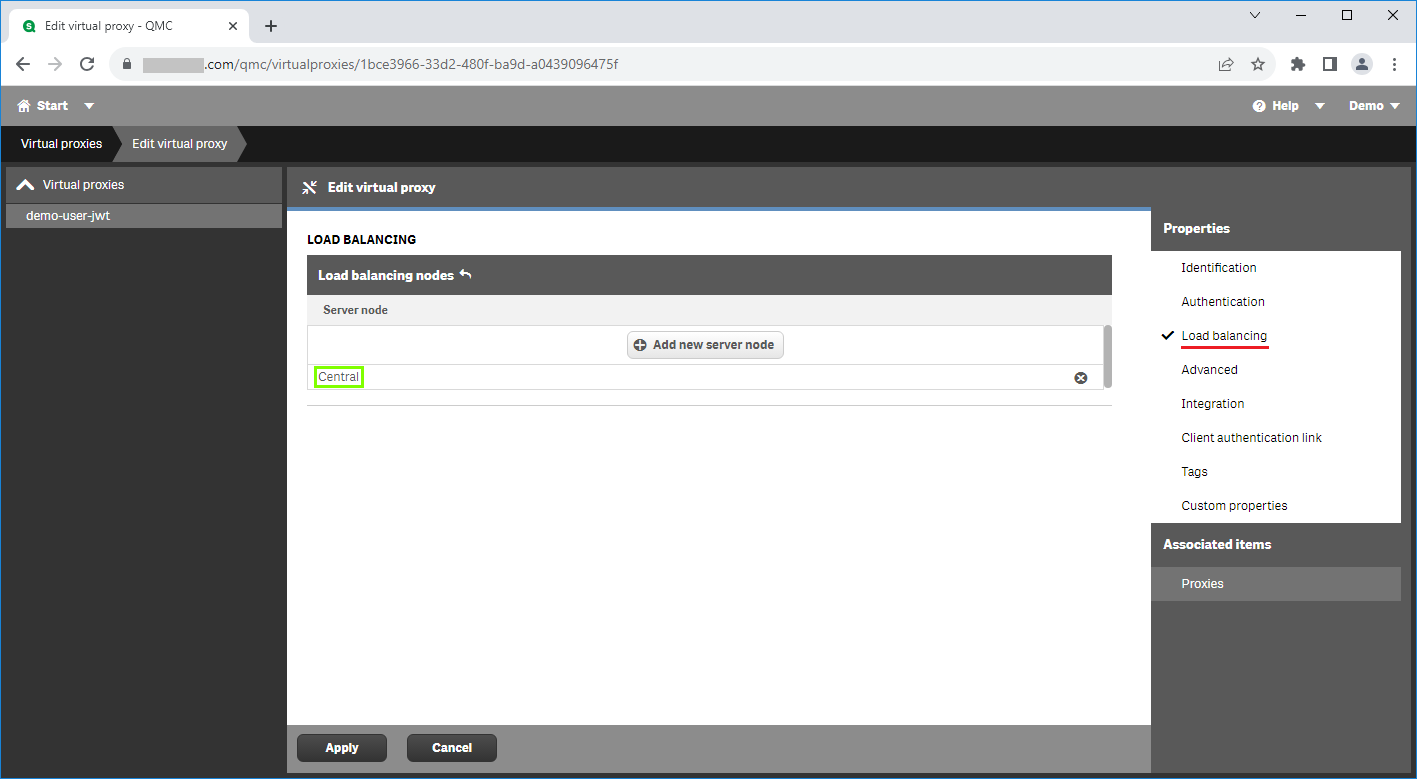
Apply changes and close QMC
2. JWT Token Generation
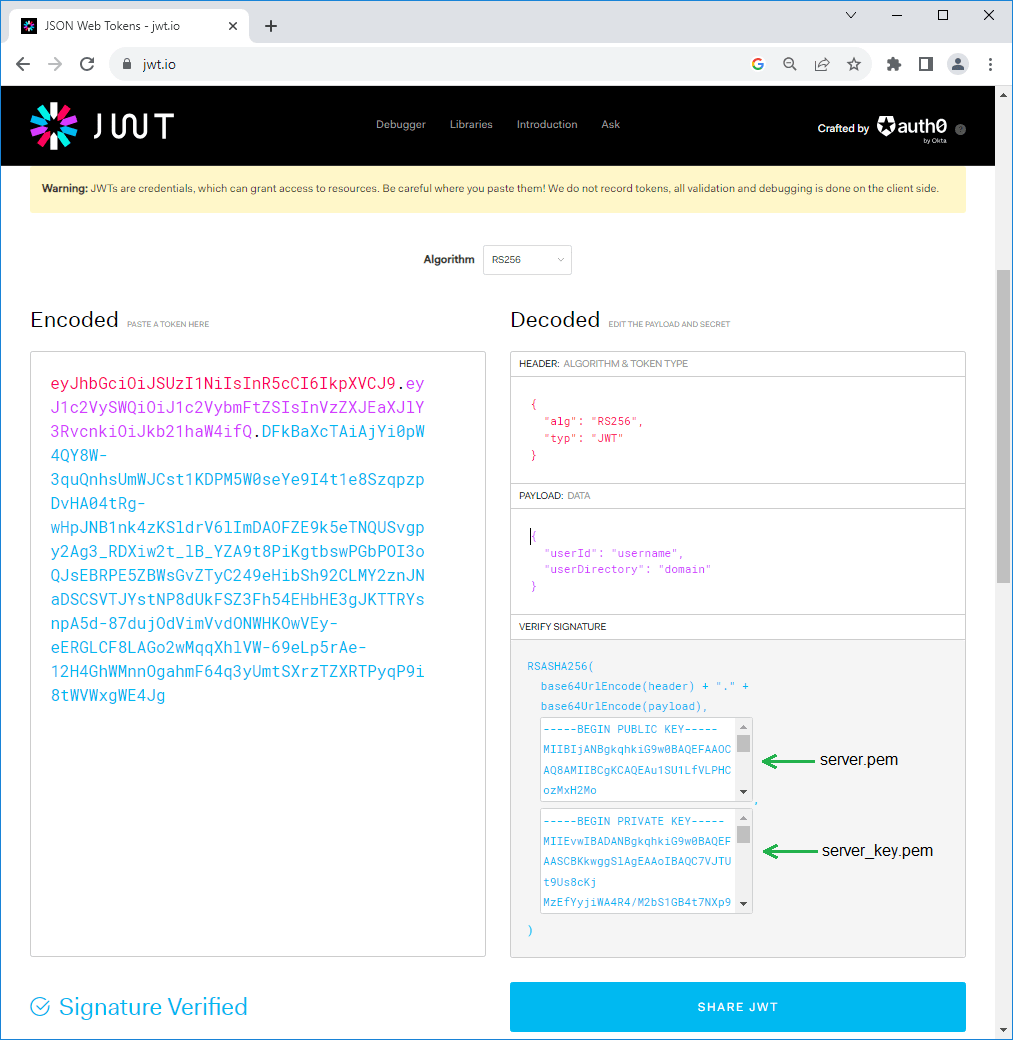
- open https://jwt.io/
- select RS256 algorithm
- in the Payload box, set up attributes previously set in the virtual proxy configuration
{
"userId": "username",
"userDirectory": "domain"
} - in the Verify signature, paste Certificate content (server.pem)and Private key (server_key.pem) content in the appropriate fields, see Qlik Sense Certificates section for details
- copy JWT Token generated and use it in QOps-SetConfig command as -JwtToken parameter value