
This page takes you from installing QOps 3.1.0 to your first application in Git. There are two ways to work: in the QOps Portal, a web app on your own machine, or with PowerShell commands. Both run the same QOps commands, so the results are the same. The Portal path comes first. Prefer the command line? Skip to the command-line path.
Prerequisites
- A machine that meets the prerequisites: Windows PowerShell 5.1 or PowerShell 7.4+ on Windows 10 or 11, or PowerShell 7.4+ on macOS (Apple silicon) or Linux
- Git installed and on
PATH - A QOps licence key
- Access to your Qlik environment: a Qlik Sense server with a client certificate, a Qlik Cloud tenant with an API key or OAuth client, or QlikView installed on the same Windows machine
- A remote Git repository, with an SSH key added to your Git provider (or HTTPS credentials)
Installing QOps
QOps installs on Windows, macOS (Apple silicon) and Linux. See Installation for the downloads and details.
In the Portal
Starting the Portal
On Windows, open the QOps Portal shortcut in the Start menu or on the desktop. On any platform you can start it from PowerShell:
QOps-StartPortal
The Portal opens in your browser at http://localhost:5555. Use -Port 8080 for another port. To stop it, click Shut down Portal on the Dashboard, or run QOps-StopPortal.
Setting the licence
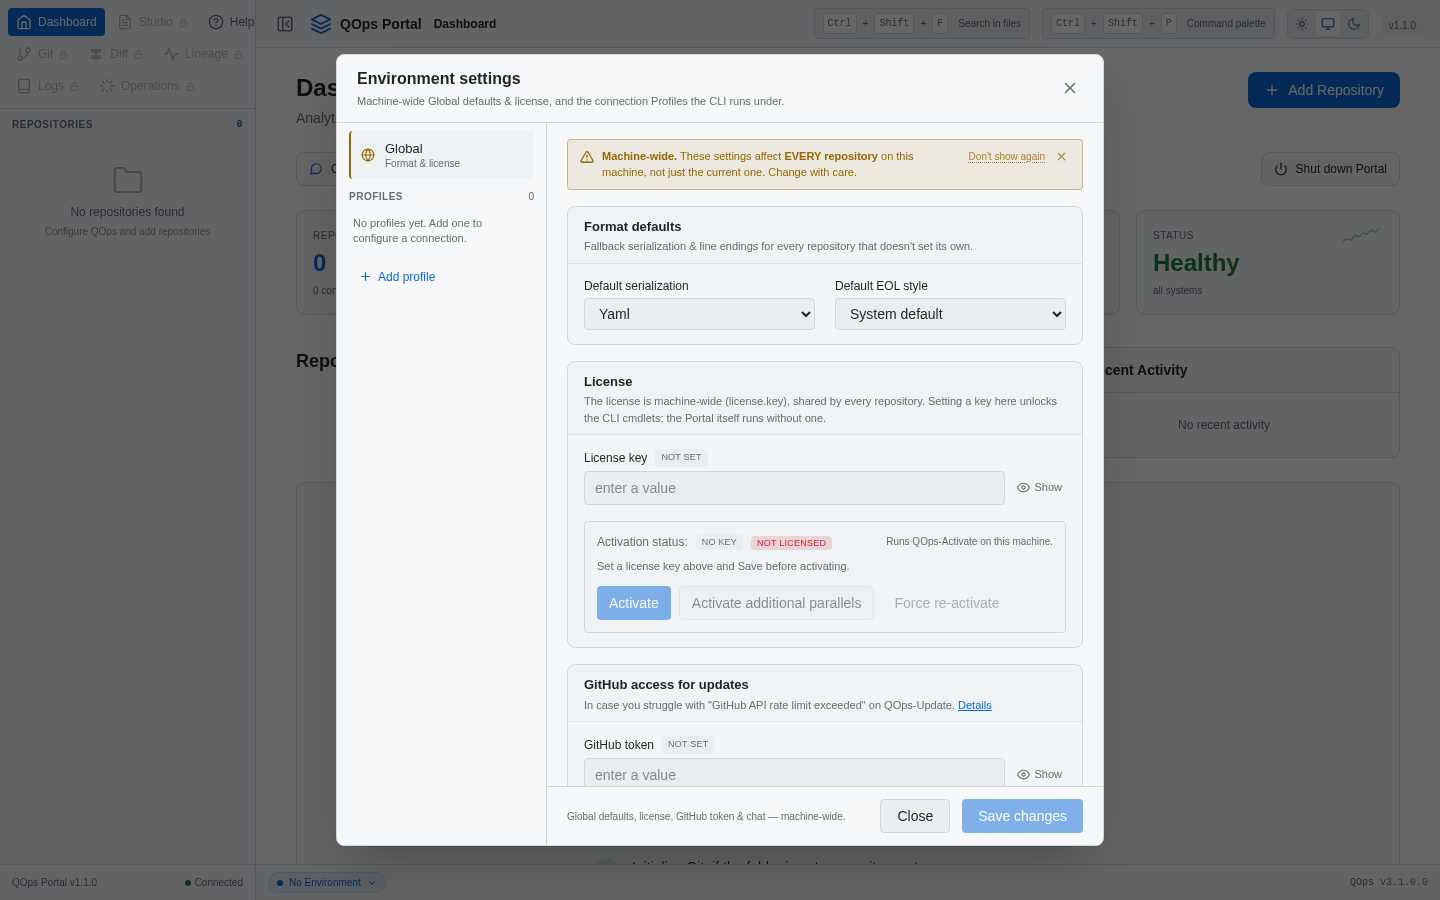
The first time, the Portal opens Environment settings by itself, on Global. Enter your key in License key, click Save changes, then Activate. Later you open the same dialog from the status bar at the bottom: click the environment button (No Environment until you add a profile), then Manage environments & license.
Connecting to Qlik
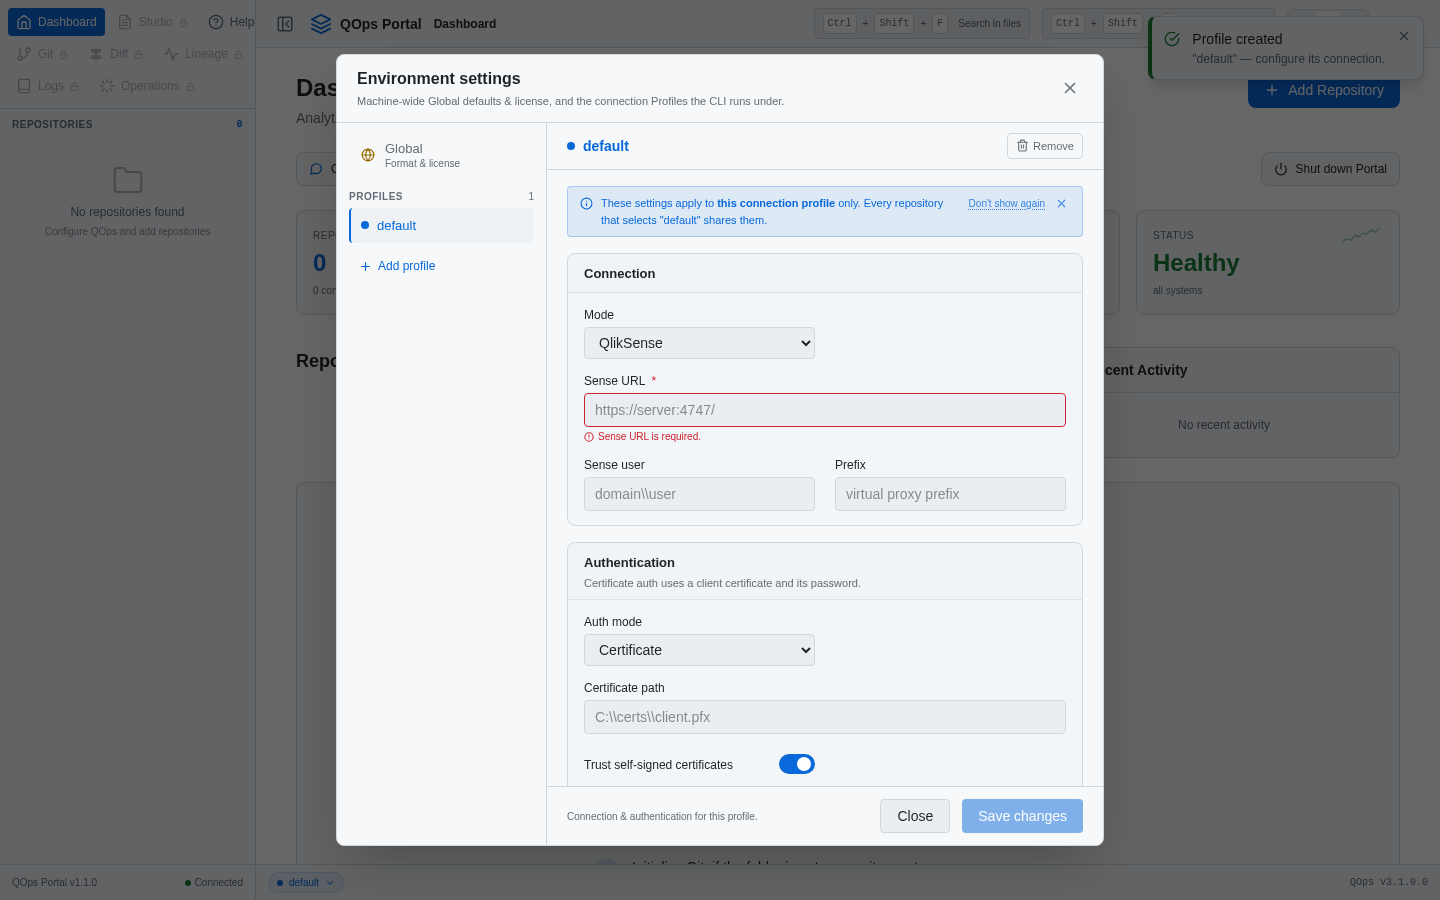
In Environment settings, click Add profile, give the profile a name, for example default, and click Add. Then fill in the connection:
- Mode:
QlikSensefor Qlik Sense (client-managed),QlikSaaSfor Qlik Cloud, orQlikView. - Sense URL: your Qlik Sense server, or your Qlik Cloud tenant, for example
https://your-tenant.eu.qlikcloud.com. - For Qlik Sense: Sense user, then Auth mode and its fields, for example Certificate path and Certificate password for a client certificate.
- For Qlik Cloud: Auth mode
ApiKeyand your API key.
Click Save changes. Secrets are stored encrypted.
Adding your repository
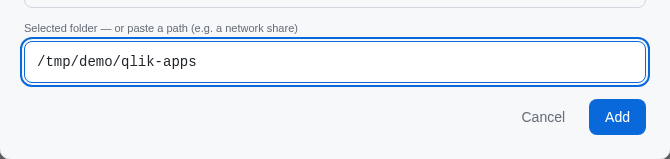
On the Dashboard, click Add Repository, choose the folder of your repository, and click Add. The Portal works with a folder on this machine; it does not clone. To start from a remote repository, clone it first and add the clone. To start fresh, create an empty folder; the Dashboard's welcome card then helps you initialise Git in it.
The repository appears in the sidebar under REPOSITORIES, with its applications listed under it.
Getting the application sources
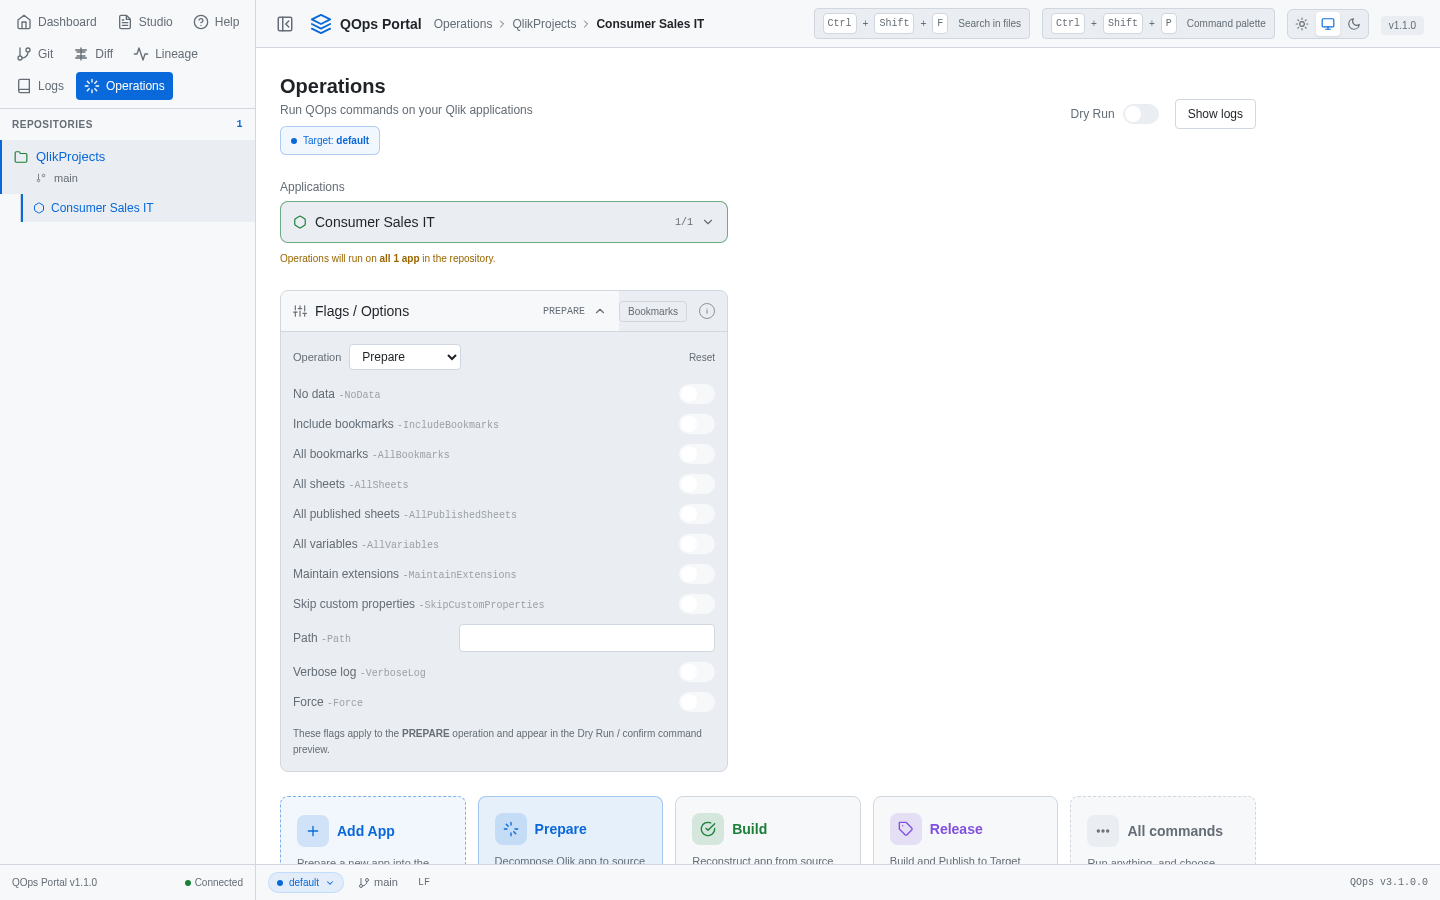
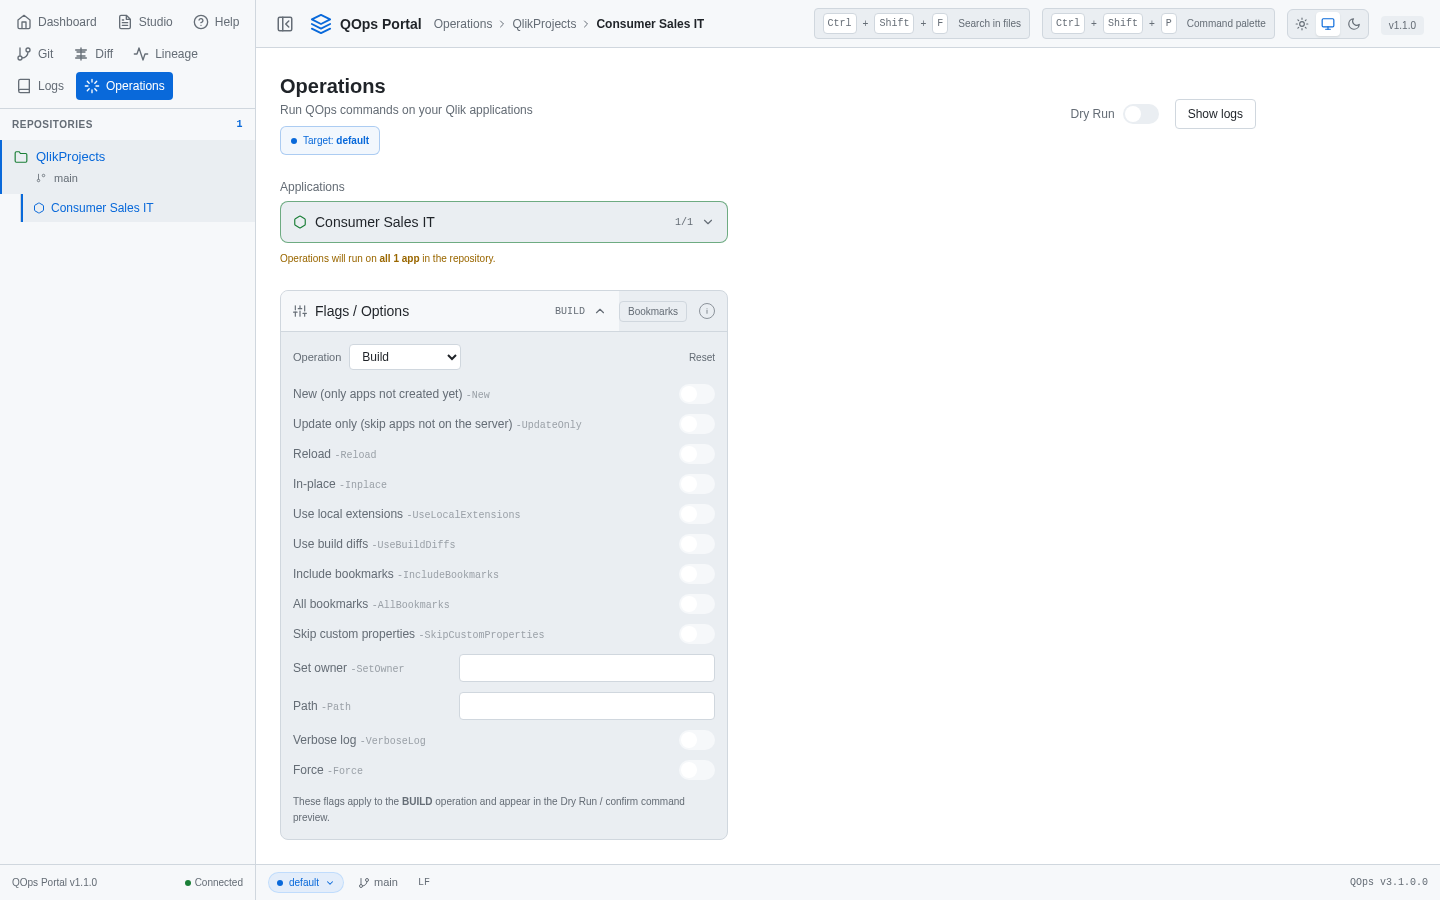
Select the repository and open Operations. Under Applications, choose the applications to work on. Then:
- Add App brings an application that is not in the repository yet, by its Id.
- Prepare writes the source files of the selected applications into the repository: one
<Name>-prjfolder per application, with the load script and folders for sheets, dimensions, measures and variables.
Flags / Options shows the options of the chosen operation. Turn on Dry Run to see the exact command first, without running it.
Building applications
In Operations, Build builds the applications from the source files, into the existing application on the server or into a new one. Its options include Update only, which never creates new applications, and Reload, which loads the data after the build. Release builds and publishes to the target stream or space in one step.
Saving to Git
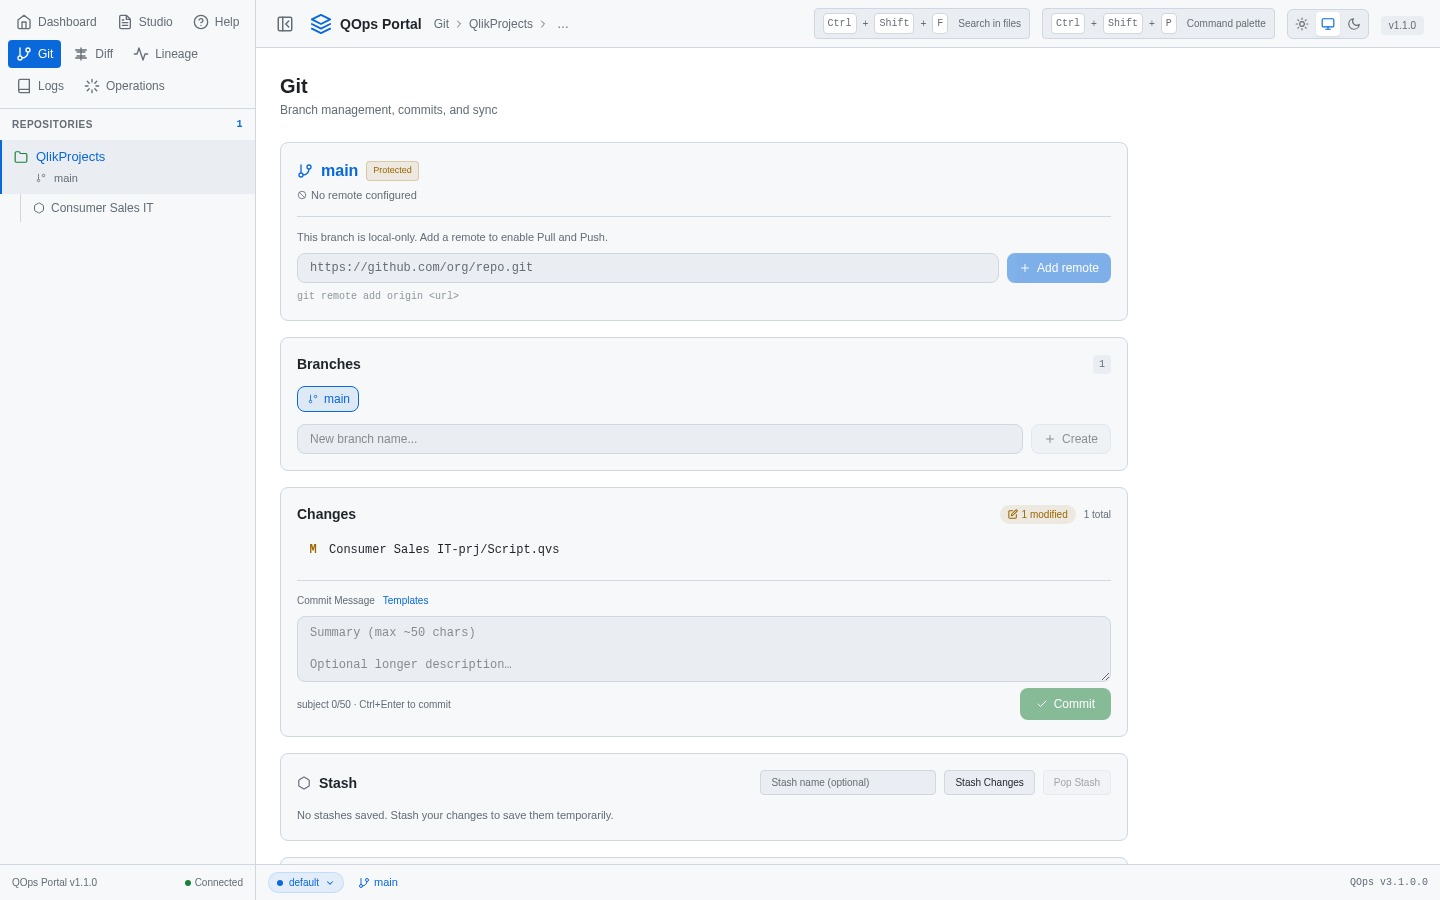
Open Git. It shows the branch and the changed files. Write a message under Commit Message and click Commit. Use Add remote to connect the repository to your Git server; the Git panel also pushes, pulls, switches branches and resolves merge conflicts.
Editing and reviewing
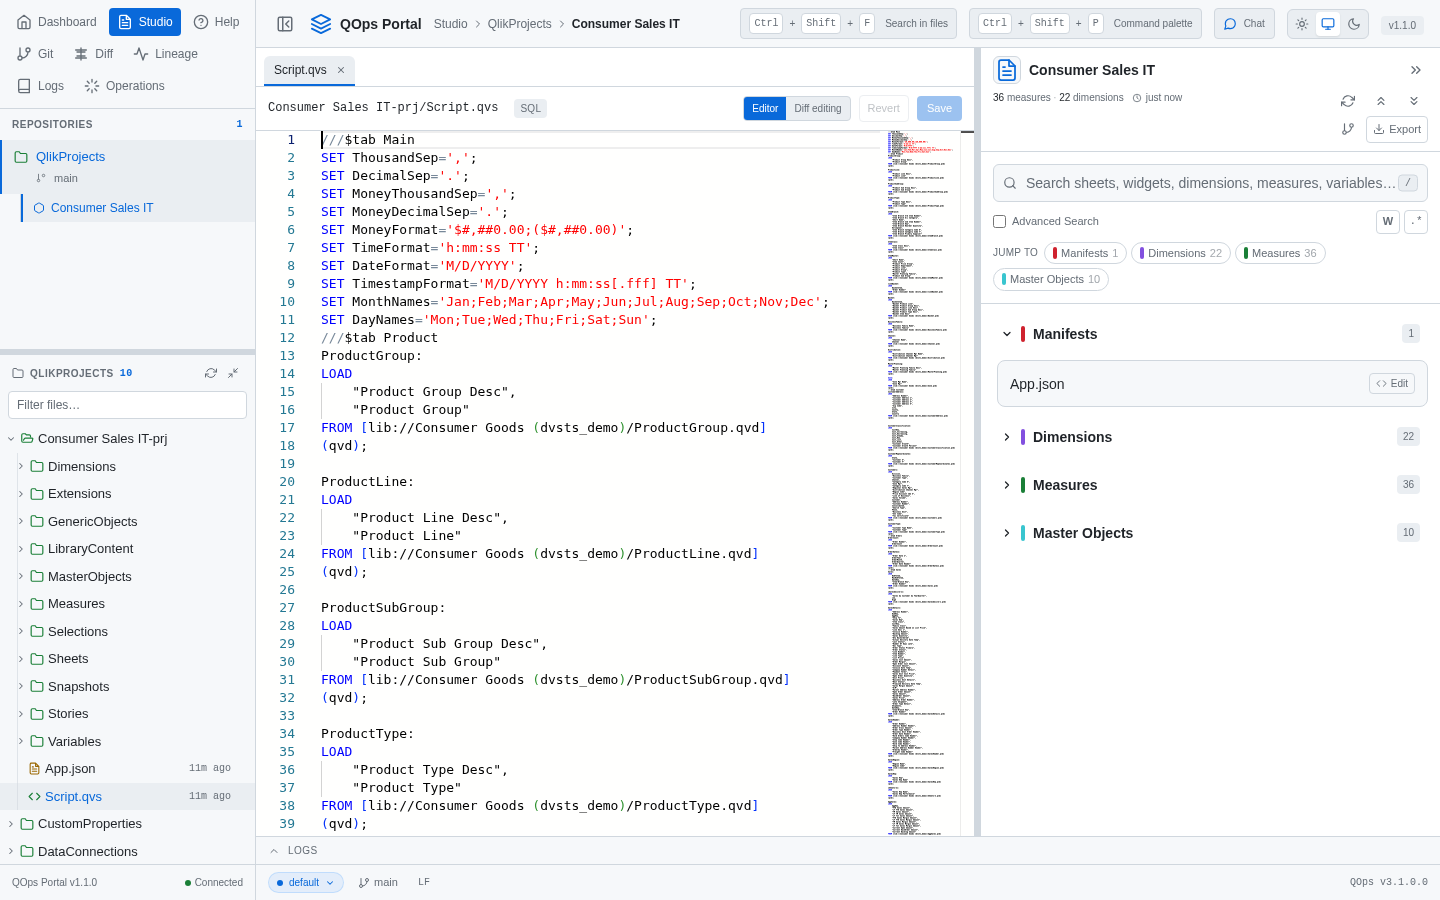
Studio opens any source file, such as the load script, in an editor. Diff compares versions, and Lineage shows how applications, sheets, objects and data connections relate.
With PowerShell commands
Setting the licence
Set your licence key once:
QOps-SetLicense "<your-licence-key>"
That is the whole step. The machine activates itself the first time a QOps command runs. To activate explicitly, or to re-activate, run QOps-Activate. To see the licence state:
QOps-CheckLicense
If this machine cannot reach the licence server, run QOps-Activate -Manual. It prints a code to use with the manual activation form on the QOps-Activate page.
Connecting to Qlik
Open the folder for your repository and run the guided setup. It asks for the Qlik mode, the server and the credentials, and writes the global settings and this repository's .qopsconfig:
cd C:\Repos\qlik-apps
QOps-Configure
To set single values instead, use QOps-SetConfig in the repository folder. It writes one setting per parameter into the repository's configuration. For Qlik Sense with a client certificate:
QOps-SetConfig -Mode QlikSense -SenseURL "https://qlik.example.com:4747" -SenseUser "DOMAIN\qlik.service" -SenseCertificate "C:\Certs\client.pfx" -SenseCertificatePassword
For Qlik Cloud with an API key:
QOps-SetConfig -Mode QlikSaaS -SenseURL "https://your-tenant.eu.qlikcloud.com" -ApiKey
-SenseCertificatePassword and -ApiKey ask for the secret without showing it, and QOps stores it encrypted. For QlikView, use QOps-SetMode QlikView.
Put QOps-SetConfig at the start of the line. If it is indented, assigned to a variable or used in a script block, it configures the nearest repository above the current folder instead.
Check the result:
QOps-ShowDefault
Applications Selection
List the applications on your Qlik environment that match a filter:
QOps-Apps -Filter "Name=Sales*"
When the list is right, save that filter to the repository so the next commands work on these applications only:
QOps-AddApps
QOps-AddApps adds to the filter already saved. Use QOps-AddApps -NoAppend to replace it, or set it directly:
QOps-SetFilter "Name=Sales*;Name=Finance*"
By default the filter is *, every application.
Source Retrieving
QOps-Prepare
QOps writes each selected application into its own folder, <Name>-prj, with the app file, LoadScript.qvs, and folders for sheets, dimensions, measures and variables. For QlikView documents, QOps writes a -prj folder and a _variables folder next to each .qvw.
Keeping applications in a subfolder
If the repository also holds scripts, pipeline files or documentation, you can keep the application folders in a subfolder such as apps/. Add the AppSubfolders setting to the .qopsconfig at the repository root:
QOps-SetConfig -AppSubfolders "apps"
List several folders with ;, for example apps;partners/emea. QOps always scans the folder that holds .qopsconfig, plus one level inside each listed folder. There are no wildcards, and an empty value means the root only. In the Portal, the same field is App subfolders in the repository settings.
QOps-Prepare writes a new application next to .qopsconfig. Move its <Name>-prj folder into apps/ once; later runs find it there and update it in place. Keep the folders named <Name>-prj so the Portal lists them too. AppSubfolders applies to Qlik Sense and Qlik Cloud.
Application Building
Build the applications from the source files in the repository:
QOps-Build
A folder that points to an existing application updates it. After a fresh clone, run the first build with -UpdateOnly: it only updates applications that already exist on the server you are connected to and never creates new ones.
QOps-Build -UpdateOnly
The build carries the application's content, not its data. Reload it to load the data:
QOps-Reload
To build and publish to the target stream or space in one run, use QOps-Release. For QlikView, QOps-Build writes the .qvw files from the sources in the current folder.
Git Integration
Commit the sources to the local repository. QOps-Commit runs QOps-Prepare first, then commits, and asks for a message and a branch when you do not give them:
QOps-Commit -Message "Sales: new margin measure" -Branch main
Push the sources to the remote repository. QOps-Push prepares and commits first. Give the remote URL the first time. After that QOps uses the repository's origin:
QOps-Push -URL "[email protected]:team/qlik-apps.git"
On another machine, or after someone else pushed, pull the sources and build the applications:
QOps-Pull -URL "[email protected]:team/qlik-apps.git"
Add -NoPrepare to QOps-Commit or QOps-Push, or -NoBuild to QOps-Pull, to skip the built-in step.
Updating QOps
QOps checks for a newer build once a day and installs it. To update now:
QOps-Update
QOps-Update installs the newest build of your update channel beside the version you have. If the Portal is running, stop it first with QOps-StopPortal, then start it again after the update, so that it runs on the new version. You can also update from the Portal: click the version number in the header.
CI/CD pipeline
The same commands run in a pipeline. The example below is a GitHub Actions workflow for a self-hosted Windows runner. On every push to main it checks QOps and the licence, then builds the Sales application from the repository, publishes it to the stream or space named in its properties file, and reloads it, all with one QOps-Release.
Prepare the runner once: install QOps, set the licence with QOps-SetLicense, and connect to Qlik with QOps-Configure, signed in as the account the runner service uses. Keep secrets in the runner's QOps settings or in your CI secrets, never in the repository.
.github/workflows/qops.yml:
name: qops-deploy

on:
  push:
    branches: [main]

jobs:
  deploy:
    runs-on: [self-hosted, windows]
    steps:
      - uses: actions/checkout@v5

      - name: Check QOps and the licence
        shell: powershell
        run: |
          Import-Module QOpsModule
          QOps-Version
          QOps-CheckLicense

      - name: Build, publish and reload
        shell: powershell
        run: QOps-Release -Filter "Name=Sales" -Reload
Use QOps-Release in a pipeline rather than QOps-Build. A pipeline starts from a fresh checkout every time, without the local link between a folder and its application on the server, so QOps-Build would build a new application on each run. QOps-Release finds the application by its name in the target stream or space and updates it there; on Qlik Sense and in a Qlik Cloud managed space it publishes and keeps the application's Id. For runner setup, see GitLab Runners and GitHub Actions.