The GitLab Runner provides the ability to Qlik application continuously delivery via QOps commands. This brief instruction refers to the latest GitLab documentation
The following steps will install and configure GitLab Runner on the Windows operating system to work with QOps.
- Log in to the server via Service Account
- Create a folder in the system, ex.: C:\GitLab-Runner
- Download the GitLab Runner binary file (64-bit) to the folder created.
- Rename the file downloaded to gitlab-runner.exe
-
Register the Gitlab Runner
- Run CMD command with Administrator privileges ./gitlab-runner.exe register
- Enter GitLab instance URL, ex. https://192.168.1.100/
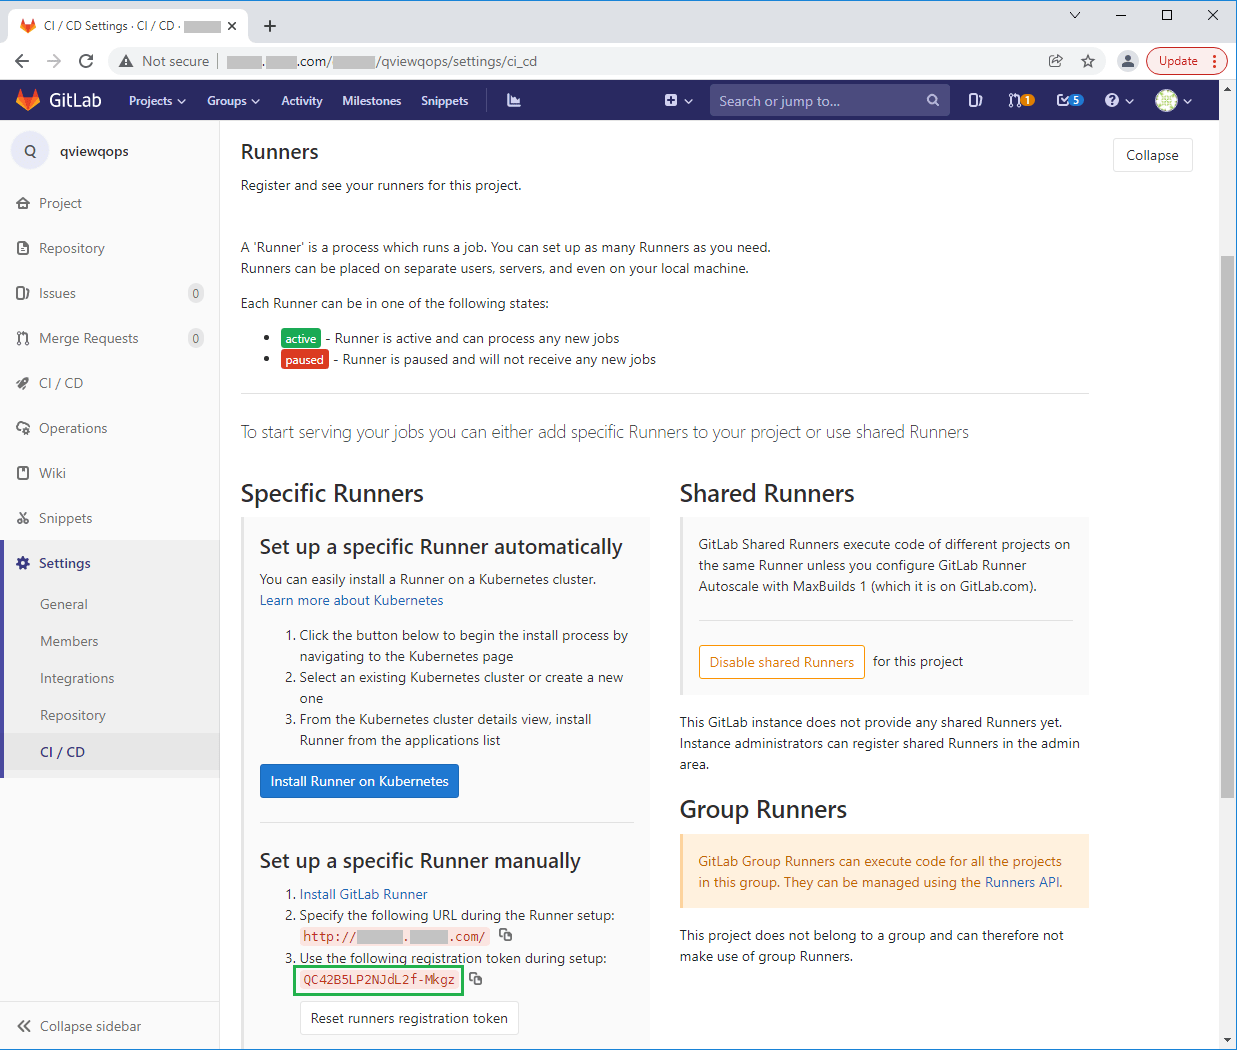
- Enter the token obtained from the GitLab instance, open GitLab – Project – Settings – CI/CD – Runners for this.

- Enter a description for the runner, ex. gitlabrunner
- Enter tags, tags entered must be used in the YML file, ex. qlik,windows
- Enter the Runner executor - shell
- Install the Runner as a service, .\gitlab-runner.exe install -user SERVICE-ACCOUNT-USERNAME --password SERVICE-ACCOUNT-PASSWORD
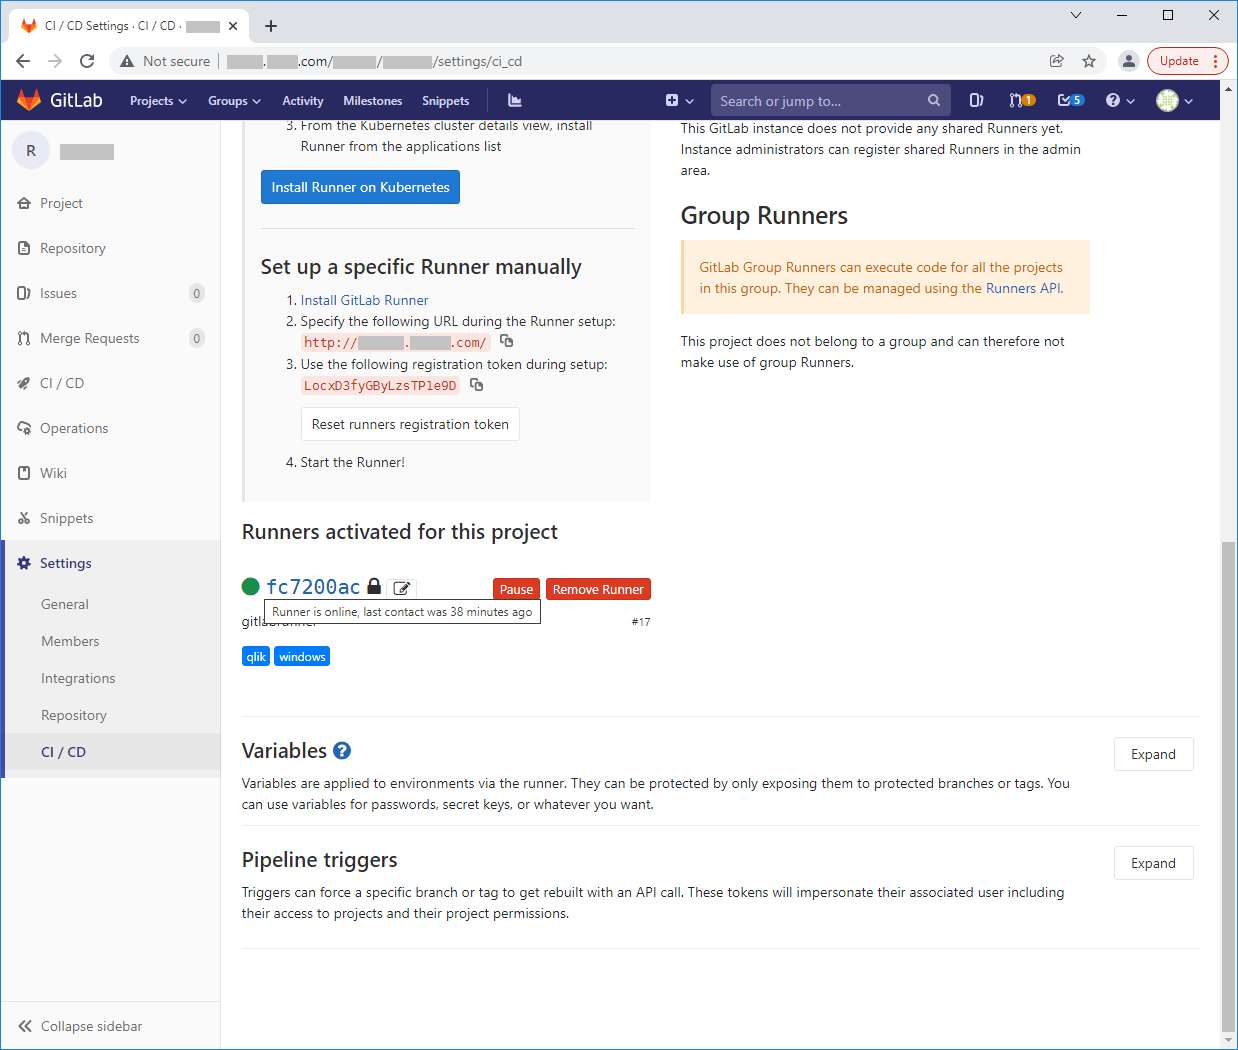
- Check that GitLab Runner is active in the project, open GitLab – Settings – CI/CD – Runners – Expand

- Create .gitlab-ci-master.yml file and include it in the root of the Repository. Check that tags configured match with tags used in a YML file.